If you came to hi3d to turn an image into a printable form, this guide clarifies when brightness should become height, when it creates only an embossing, and when a full object or lithophane is the better fit.
The same picture can become a raised tile, a freestanding object, or a panel that reveals its image when lit from behind. The right method depends less on the file type than on what its bright and dark areas are supposed to mean.
The short version
- If brightness represents actual elevation, use a heightmap-to-STL workflow. White rises, black stays low, and the result is a solid relief on a flat base.
- If it is an ordinary photo, brightness-based conversion makes an artistic embossing, not an accurate shape. Use it when that stylized surface is the point.
- If you want to hold the subject and see its back and sides, use an image-to-STL generator that builds a full object.
- If you want the photo to appear when light passes through it, make a lithophane. Its dark areas are thicker, not taller terrain.
First, ask what the pixels describe
A grayscale image looks like a simple input, but it can carry different kinds of information. In a terrain heightmap, each gray value stands for elevation. A pale ridge is meant to rise above a dark valley. Converting those values directly into surface height preserves the image’s purpose.
In a normal photograph, brightness does not reliably describe depth. A white shirt may sit behind a dark hand; a shadow may cross an otherwise flat surface. If you assign height to those pixels, the shirt rises and the shadow sinks. That can make an attractive plaque, but it cannot reconstruct the photographed scene.
For the elevation or embossing route, 3D Studio’s heightmap to STL converter turns grayscale brightness into a closed relief with a solid base. It accepts grayscale images, depth maps, logos, and photos, so the input need not be a formal terrain map. What matters is whether you want brightness to become height.
That distinction saves the most frustration: choose the result first, then choose the tool. A printable file is not necessarily the print you pictured.
Use a heightmap when the image already contains height
Terrain exports and depth maps are strong candidates because their tones were made to describe a surface. A grayscale logo can work too, provided you want its lighter regions raised. The heightmap converter maps gray values to height in a direct, predictable way: at an 8 mm relief height, mid-gray sits 4 mm above the base.
The base matters as much as the raised surface. A displaced image on its own is just a sheet of geometry; a slicer needs a closed solid to make a dependable print. The converter puts a solid base beneath the relief and exports a watertight STL or 3MF. The print lies flat, so its slopes do not require supports.
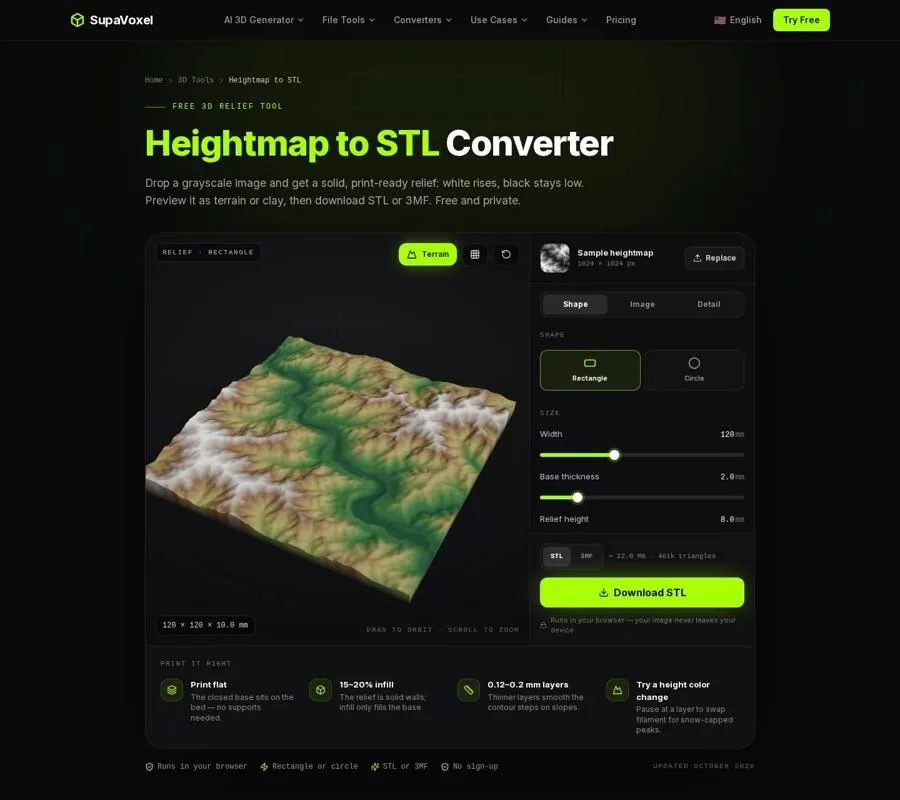
The Heightmap to STL page lets you judge the raised surface before exporting a solid relief.
For a map, I would inspect the source before adjusting the mesh. Are waterways dark because they are low, or because someone drew them in dark ink? A labeled map is not automatically a heightmap. Text, borders, and shaded artwork will rise or sink along with the terrain.
The same check applies to depth maps. Some encode near areas as dark rather than light. In that case, the converter’s Invert setting swaps which tones rise. Smoothing can reduce visible steps or compression noise, but it cannot correct a source whose brightness never represented the shape you wanted.
There is also a resolution limit to understand rather than fight: the browser reads image values at 8 bits per channel. A higher-bit-depth terrain source is reduced to 256 gray levels. For a decorative print, smoothing can hide the resulting terraces; for work that depends on preserving the source’s height precision, that conversion may be the wrong route.
Use a photo as relief when you want an interpretation
A photo-based relief is best treated like an embossing. Strong silhouettes, deliberate lighting, and simple backgrounds tend to read more clearly than a crowded scene. The converter has no way to know that a dark eye should not be a hole or that a bright highlight is not a mountain. It follows the brightness you give it.
This method fits a sign, wall tile, or stylized portrait viewed by reflected light. Side lighting makes the raised areas cast small shadows and helps the surface read. Flat light from the front can make a carefully shaped relief look nearly featureless.
Before converting a photo, I would crop away distractions and decide which bright regions should physically stand proud. Contrast can separate the important shapes; gamma changes how the middle tones contribute to height. Smoothing is useful when grain or JPEG blocks would otherwise become tiny bumps. Check the preview after each change rather than assuming that more contrast always means more legible geometry.
A relief is also a sensible choice when the image is fundamentally flat: a badge design does not need an invented back. But if the goal is a recognizable figurine, adjusting the relief settings will not get you there. The missing sides are a different modeling problem.
Use a full model when the back and sides matter
A raised panel can look convincing from its intended viewing angle, but turn it over and the illusion ends. For a toy, character, animal, or prop you plan to handle, you need volume all the way around.
3D Studio’s image to STL generator takes a picture and predicts a full object, including surfaces the picture does not show. That prediction is useful for a sculpture, not for a dimensionally exact replacement part. The unseen back is inferred; it has not been measured. If a bracket or knob must fit another object, measure it and model it in CAD instead.
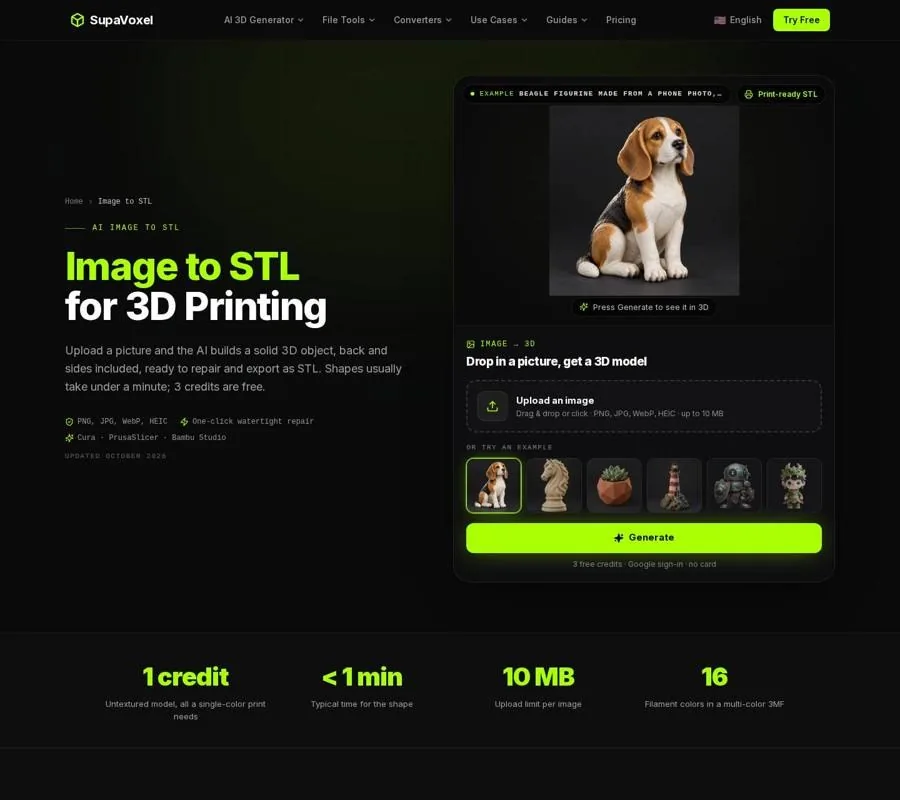
The Image to STL page is for a complete object rather than a raised image on a plaque.
This route also changes the print-prep job. A freestanding shape may have overhangs that need supports and small features that need checking. The studio has a repair step for making the mesh watertight before export. STL itself carries no real-world units, so set the intended size in your slicer rather than trusting the file to arrive at the right physical scale. New accounts get 3 free credits at sign-up; direct STL export is on a paid plan.
If you want more control over the geometry, the image to 3D model Blender guide compares modeling over references, displacing an image, photogrammetry, and importing an AI mesh. Those are different ways to solve the same choice: preserve supplied height, measure a real object, or infer a shape from limited views.
Use a lithophane when light is the image
A lithophane reverses the viewing logic. You do not primarily read it by shadows falling across raised terrain. You put a light behind it: thin areas pass more light and appear bright, while thick areas appear dark. Unlit, it may look like an unremarkable panel with faint surface variation.
3D Studio’s lithophane maker is free to use and provides a backlit preview, so you can judge the photograph as a transmitted-light image before downloading STL or 3MF. It offers flat, curved, lamp, circle, and heart shapes. That makes it the better choice for a glowing family photo than a conventional heightmap relief.
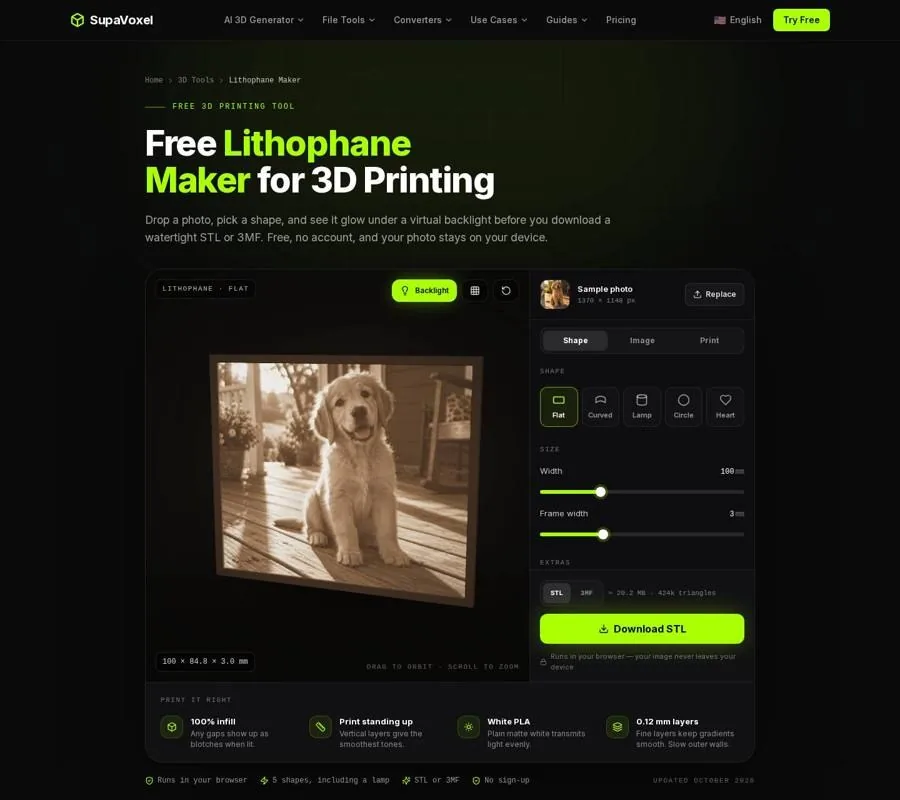
The Lithophane Maker page previews the picture with simulated light passing through the panel.
Printing is different, too. Print a lithophane standing up, as exported, for smoother tones; print a heightmap relief flat on its base. Make the lithophane image area solid with 100% infill or enough walls that infill does not interrupt the picture. Matte white PLA is a useful starting material because the image depends on controlled light transmission. A backlit preview cannot compensate for a sparse interior or a filament that obscures the tones.
A final check before you slice
Look at the output you expect to display, not just the input you have:
- A surface with meaningful elevations? Make a heightmap relief. Check whether the source’s gray values really encode height.
- A graphic interpreted as raised texture? Use photo relief, then inspect what highlights, shadows, and background noise became.
- A subject you can turn around? Generate or model a complete object, and expect to check scale, overhangs, and the inferred back.
- A picture revealed by a lamp or window? Make a lithophane and plan the print around transmitted light.
If the first preview looks wrong, do not immediately increase detail. Confirm that you chose the right interpretation of the picture. More mesh detail faithfully reproduces bad input just as readily as good input.
FAQ
Can I use a regular photo in a heightmap converter?
Yes, but it becomes brightness-based embossing. Pale pixels rise and dark pixels stay low; the result does not recover the photo’s real depth.
Is a lithophane the same as a photo relief?
No. A photo relief is read mainly by light falling on its raised surface. A lithophane is read by light passing through walls of different thickness.
Why not make every image into a full 3D model?
A full model has to infer surfaces the image cannot show. That is useful for a figurine, but unnecessary for a map or sign—and unsuitable when the geometry must match precise measured dimensions.